The Scout Report | Round 10 v Sydney Swans
Written by Dan Williams
Sydney Swans
A side that is in the exciting stage of a list, where it is coming into the hot zone for a budding flag contender.
So far this year they have a record of 6 wins and 3 losses, and have shown the "Horse" brand last week, in a comprehensive performance; utilising direct football and the ability to cut apart opposition by foot.
However 2 disappointing losses have come for the Swans prior to the good performance vs the bombers, and although an impressive outfit, sides that have been willing to take the game on have found success countering the kicking game of the Swans.
A real blockbuster tie for a Friday and one that will really set a standard for the teams who are considered the next best after Demons & Lions.
Death by a 1000 Kicks
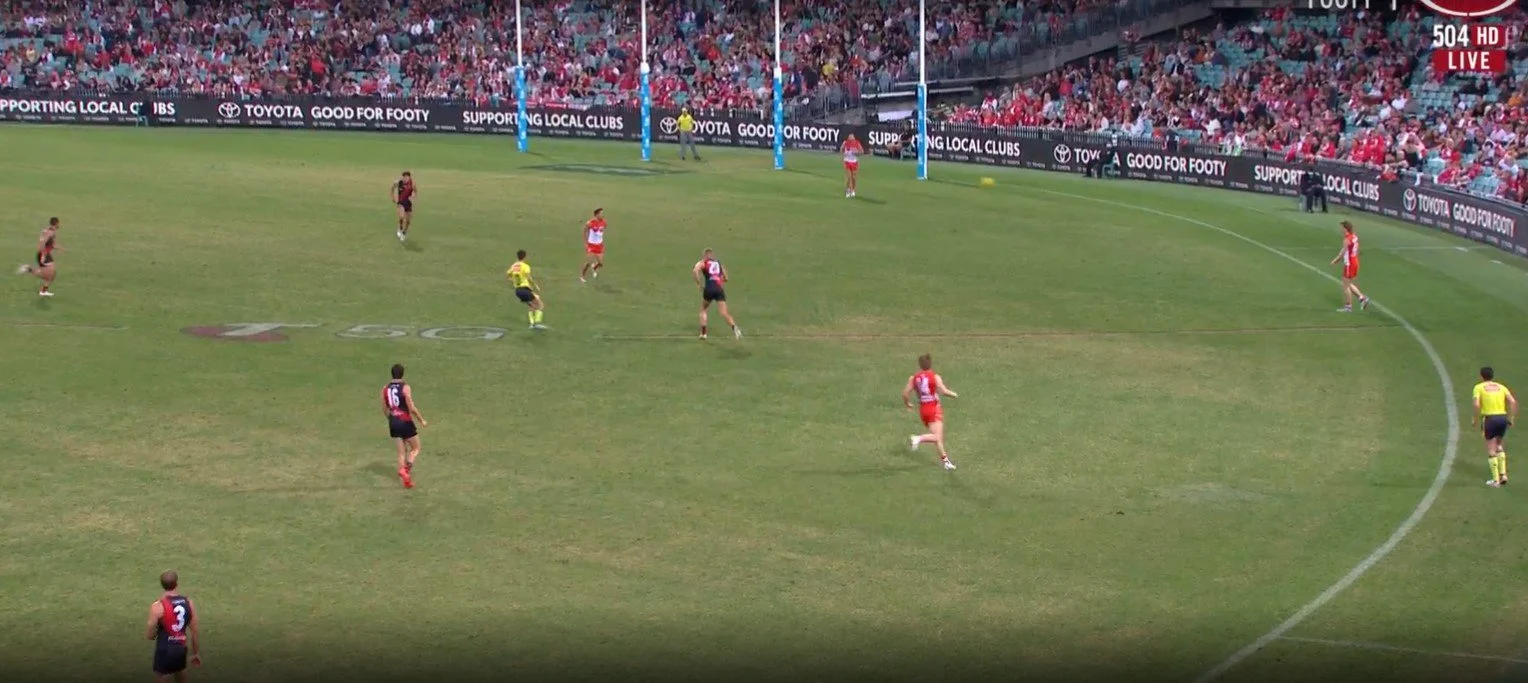
A staple of the Swan's game plan is their ability to be patient with the ball in hand. They move hard for each other into space and are patient in their approach. often moving the ball into the corridor and back behind the hot zone of midfield. They wait for a moment of lack of discipline and then they go.
Kennedy here takes the ball in the corridor, as no options are presented he simply goes back to Blakey (who started this chain) This shifts Essendons zone again from central to the right hand side (Essendon Facing) and they look for the opportunity to present itself. Notice how Sydney look to roam towards the ball carrier at all times.
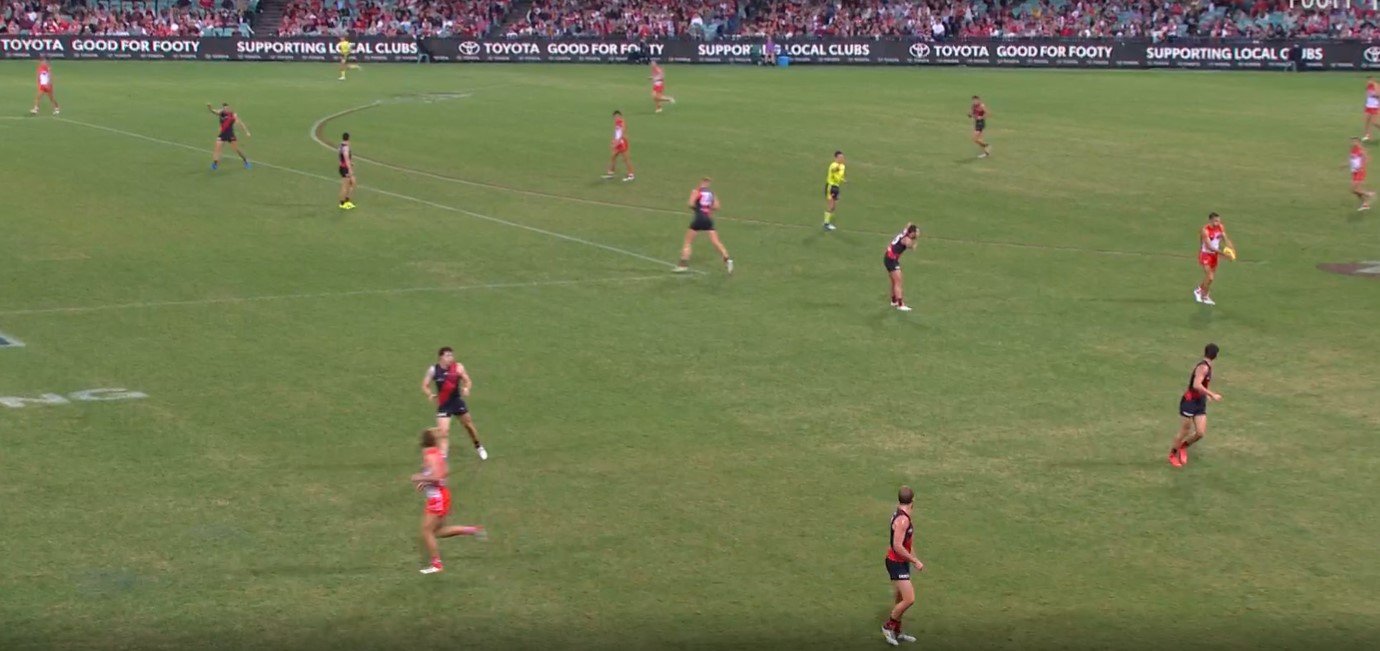
Blakey sees Essendon react to this movement by beginning to press and cut off the short options. Blakey counters this by taking a bounce and driving in the space between the wing and corridor option. Causing the press to then react to it. Good movement ahead of the ball now allows Mids to be free and they actively work towards Blakey, and the wings and forwards start to find pockets of space behind waiting for the kick.

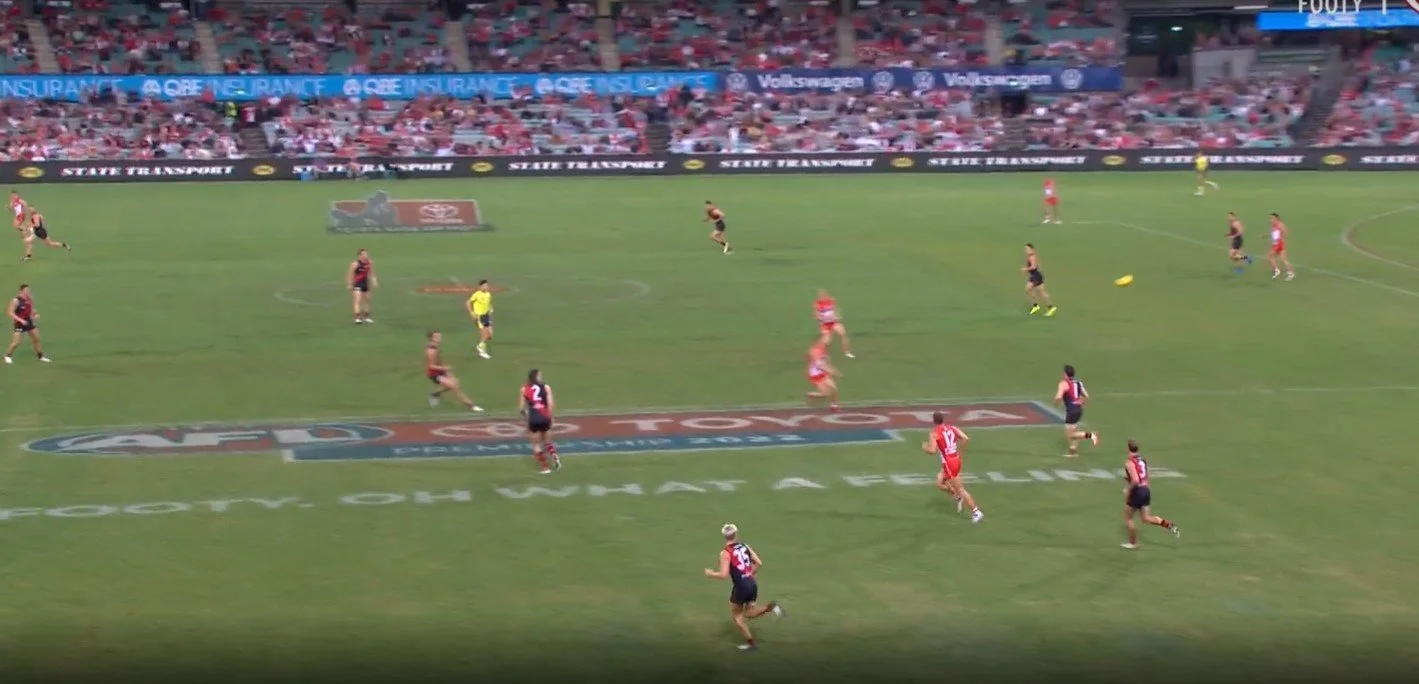
After a chain of 5 possessions, Sydney have the ace up their sleeve in case of no outlet ball. Buddy roams on the outside 50m arc (60m out) and looks to lead up, on this occasion the kick is too high, but he manages to bring it to the ground and from here Sydney has the outnumber. This is a common method of targeting this area and utilising their craft smalls (Papley Gulden Etc) and their elite mids (Mills and Heeney). The Source is key here to be stopped, otherwise, this method requires way too much leg work from the defending side as you effectively chase shadows.
Death by a 1000 Kicks - The Cure

Carlton in recent weeks has added the much talked about a layer of transition defence and scoring from turnover. They have achieved this with planning. Structurally they have set up to defend a part of the ground and leave a man open to force (funnel) the opposition's ball movement out wide. This works 2 fold. One it allows them time to get back as the fat side of the ground is the furthest to the goal, and 2 it allows them to funnel the ball into traps they set around 60m.

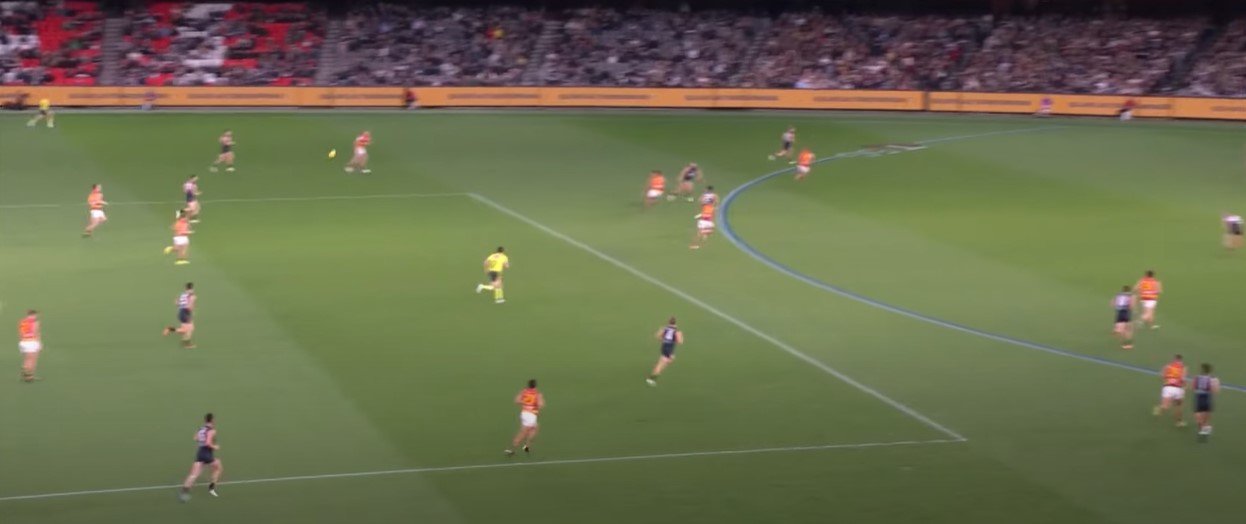
With the corridor cut off, you will see a common trait in pairs working the wings. Here Plowman comes off his man to aide Walsh who pressures the kick. Plowman makes the handball over the top a high risk play, and Walsh appraoches from the corridor side. Leaving Kelly one option to go long to the cluster outside the arc.

Weitering often is paired with Saad to act as his crumber in the attack of an aerial threat, and Doc is paired with (Kemp or Young when available). This pairing is key, as Kemp was if the kick fell short and Weitering hangs back allowing him time to attack the ball from the side. Here he takes a mark and as the corridor was protected, it now becomes an avenue to transition quickly.

A Quick handball off, and Carlton now can move the ball quickly and overlap the opposition's zone attack. Jsos and Motlop work very hard from the wide positions to create that extra in the middle on transition enabling them to focus their ball movement in the shortest avenue to goal and create a scoring opportunity from the opposition's hard work.
Dual Rucks Roaming Forward

Ladhams & Hickey offer a very unique threat as both are very capable Ruckmen in their own right. But they also are strong as an additional forward and have complimenting skills for each other. Often both will be deployed in the area where they are struggling to gain an impact. In this example, Notice Hickey lurks from deep and Ladhams is the target.

Ladhams being the deepest forward causes issues for defenders. As generally the Target here would be the short kick to a marauding Buddy, But with the addition of Hickey outside the hot zone and coming in, it causes multiple options that you have to be aware of. Here Ladhams taps it forward to the area for his smalls to put pressure on.

With the pressure on the ground, a rush kick out to the pocket creates an opportunity for Hickey to roam and cause another spoil to ground. As effectively now Essendon have to fight against 3 Talls and worry about Buddy lurking outside 50 on the entry, invariably this creates a mismatch. In this example Hayward has a crumbing goal.
Dual Rucks Roaming Forward - The Cure

Carlton came up with a similar problem last week in Preuss, Riccardi & Himmelberg. Who often rotated and slotted in. Greene and Hill were the threats on the deck for Carlton. They reacted to this by deploying Walsh & Cerra in these areas knowing that the key was to avoid marks, but then avoid the pressure on the Deck. Both Cerra and Walsh have the fantastic ability at averting traffic and getting it out of hot zones.

Kemp and Young (When in) are very strong at not being Marked on. Carlton looked to bring their strong contested players to roll backwards. Often seeing Plowman and Saad be further up the ground with Doc as the outlet ball and offering themselves up. Here Walsh takes the crumb and looks to relieve the pressure.

An outlet kick to Cerra brought a handball inside to Durdin, This opened up the wing and more importantly was a subtle switch. As Gws attacked the left-hand side. Carlton now had space to play with and look to form a transition score. Voss has a full team defence mentality, particularly from his small flank players up forward. You will often see Durdin and Motlop being deployed in these outlet roles to offer some zip and energy to get the ball moving forward. Both players were often cited as being in the defensive end, but getting up the ground very quickly to offer something forward.
Callum Mills

Callum Mills has been deployed almost exclusively as a Midfielder this year. Ranking top 20 for nearly all the stats in his role for the club. His direct approach to the game is a catalyst for everything good that Sydney created. Here is a great example of how he looks to attack every contest and works incredibly hard to be the outlet ball for his side's ball carriers.

Sydney is under a bit of pressure here with the Hawks having the outnumber. But he is confident to break into space and look to find the ball on the overlap. This is common in the Swans system, as invariably he is available to be the offload in tackles. and with his injection of pace and direct running patterns, it creates space for him to enter 50 with ease from this are outside the 50 (A primary attack point for Sydney with Buddy)

An easy run into the goal for Mills, in this scenario. However, you will often see this ten metres further back as he is 12th for inside 50s and 12th for score involvements per game. Notice Buddy to his left. Often when the ball is shallow into Buddy this movement will happy a lot from a handball out from the park from the crumb and it creates opportunities for him to use his elite kick to pick off unmanned targets inside 50.
Crippslow 2022
One Real noticeable change to Cripps and his game in 2022. Is the addition of this forward rotation. Carlton has recruited heavily in the midfield and this has enabled him to be an Impact player in hot zones around the ground. People talk a lot about his forward work but he has also been deployed down back under the Kosh to act as an enforcer.

Cripps has unique traits with his height and his ability to lead exceptionally well. Cripps has often taken the opposition's best tagger forward with him and floats in the space and to the side of Carlton's primary target. Often you see Cripps as a benefiter of a chopping free, or an in the back decision as if the ball isn't marked he has an uncanny ability to move the ball from a ground position to the advantage.

Another huge improvement has been his kicking at Goal. Cripps has worked noticeably hard on that and the time frame of his goals has been at important stages in the Game. For years Carlton fans have begged him to be the Dustin of this side. However he has become more a Fyfe, and now is added to the areas of concern and can change a game in a heartbeat. Easily this year the best player in the competition and is almost impossible to stop with the talent Carlton has at their disposal.
The Possible In’s

Liam Stocker is confirmed to return, and this fixture is very much made for him. Based on his VFL form and the recent AFL fixture he played. He brings intensity particularly around the aerial contest and on the ground game. This fixture will showcase his direct ball movement too from down the back. Often versus North, we saw his ability to work hard ahead and behind the ball to free himself up and take the ball in tough areas and hit a flat kick to the wings allowing a transition. A great matchup presents itself for this fixture versus Heeney who himself looks to bring it to the ground and play around the ground.

Probably the most underrated player in Carlton's last 3 games played. A player who has really built a connection with Weitering and allows Jacob to be free outside of the aerial contest and attack from the side. One keynote of Lewis’s Game is his ability to read the ball in flight and then execute the right kick to transition attack. Lewis has primarily been the go-to guy with TDK to protect the inboard kick that comes from the wing, and that partnership with TDK being the tall down the wing and him the next kickback has caused the opposition major problems when transitioning the ball into Carlton's D.50. A big in for Carlton and one that makes the task of setting a Buddy Trap (which they executed perfectly to Tex) even more tantalising.
Conclusion
A Real tasty encounter under the lights at Marvel on Friday. One of the lesser talked about elements of Carlton's year has been their form at Marvel. With the width being considerably narrower than the G it allows Voss’s plan of containing the corridor on transition and funnelling the opposition's ball movement a lot easier. Kicking will be a lot tougher in terms of finding space and if Carlton can control the Middle (which so far they have) and find and continue to build an element of transition this fixture could be very very intriguing.
Sydney has the Media plaudits however they have come unstuck against sides that have looked to run and carry, and based on the last 2 weeks and with Carlton being forced to find other avenues to goal, Carlton will feel like they have the tools to do the job!
Carlton by 21!